Environment Variables
Here’s a detailed guide for setting up environment variables.
Setting Up Environment Variables
1. Create the .env File
- Copy the
.env.examplefile. - Create a new
.envfile in the same directory. - Populate the
.envfile with the following variables:
DATABASE_URL="mongodb://localhost:27017/next-starter"
NEXTAUTH_SECRET="Generate a random string with openssl rand -base64 32"
GOOGLE_CLIENT_ID="GOOGLE_CLIENT_ID"
GOOGLE_CLIENT_SECRET="GOOGLE_CLIENT_SECRET"
GITHUB_CLIENT_ID="GITHUB_CLIENT_ID"
GITHUB_CLIENT_SECRET="GITHUB_CLIENT_SECRET"
REDIS_URL=redis://localhost:6379
SESSION_SECRET="Generate a random string with openssl rand -base64 32"
AWS_SECRET_ACCESS_KEY="AWS_SECRET_ACCESS_KEY"
AWS_ACCESS_KEY_ID="AWS_ACCESS_KEY_ID"
AWS_REGION="AWS_REGION"
2. Install OpenSSL
- Download OpenSSL:
- Visit the official OpenSSL website: https://www.openssl.org/.
- Download the version compatible with your operating system.
- Install OpenSSL:
- Follow the installation instructions for your OS.
- Set Up OpenSSL Path:
- Add the OpenSSL installation path to your system’s environment variables.
- Verify Installation:
- Open a terminal or command prompt and run:
openssl version - If the version is displayed, OpenSSL is installed correctly.
- Open a terminal or command prompt and run:
3. Generate Random Strings for Secrets
- Generate a random string for
NEXTAUTH_SECRET:openssl rand -base64 32- Copy the output and paste it as the value for
NEXTAUTH_SECRETin the.envfile.
- Copy the output and paste it as the value for
- Generate a random string for
SESSION_SECRET:openssl rand -base64 32- Copy the output and paste it as the value for
SESSION_SECRETin the.envfile.
- Copy the output and paste it as the value for
4. Set Up MongoDB
- Sign Up/Log In:
- Go to MongoDB Cloud.
- Sign up or log in to your account.
- Create a New Project:
- Click on New Project.
- Name your project (e.g.,
next-starter). - Add yourself as a member.
- Create a Cluster:
- Click on Build a Cluster.
- Select the free tier (
M0). - Choose your preferred cloud provider and region.
- Click Create Cluster (this may take ~5 minutes).
- Set Up Database Access:
- Navigate to Database Access under Security.
- Add a new database user with a username and password.
- Assign the user the appropriate permissions (e.g.,
Read and Write).
- Set Up Network Access:
- Navigate to Network Access under Security.
- Add your IP address or allow access from anywhere (
0.0.0.0/0).
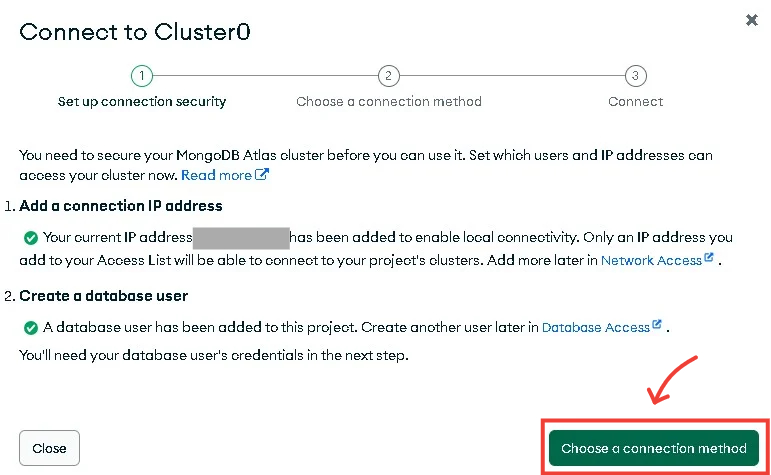
- Get Connection String:
- Navigate to Database > Connect.
- Select Connect your application.
- Choose the driver (e.g.,
Node.js) and version. - Copy the connection string.
- Replace the
DATABASE_URLin your.envfile with the copied string. Update the username and password if necessary.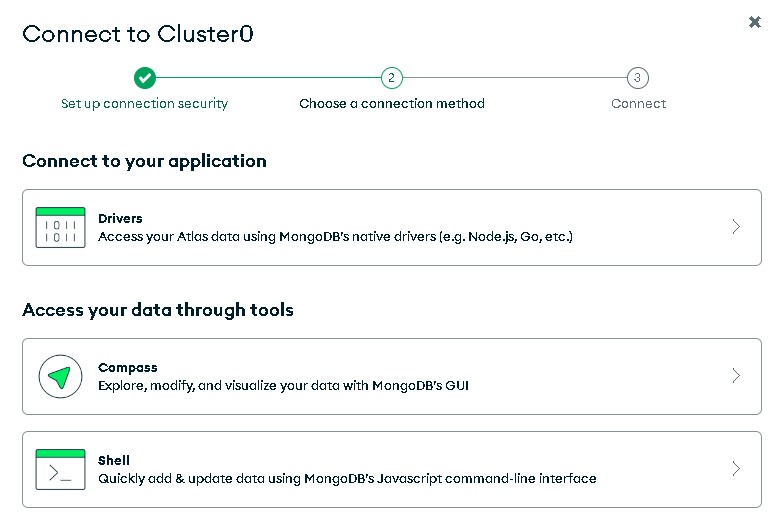
5. Set Up Google OAuth Credentials
- Go to Google Cloud Console:
- Visit Google Cloud Console.

- Visit Google Cloud Console.
- Create or Select a Project:
- Create a new project or select an existing one.
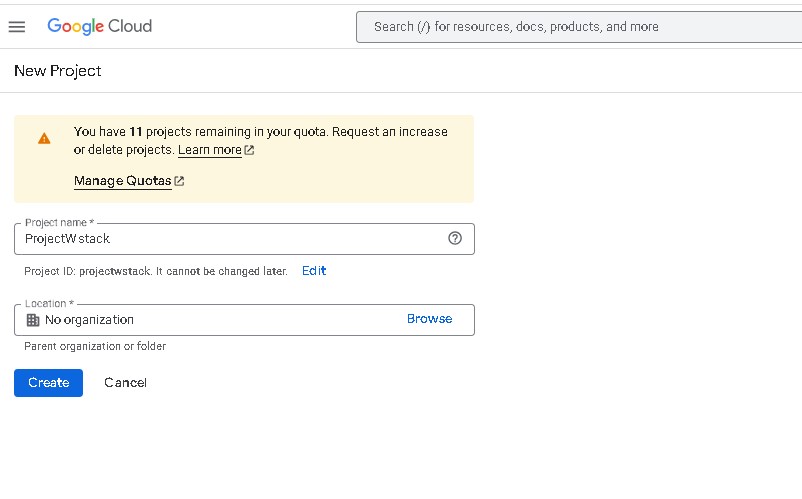
- Create a new project or select an existing one.
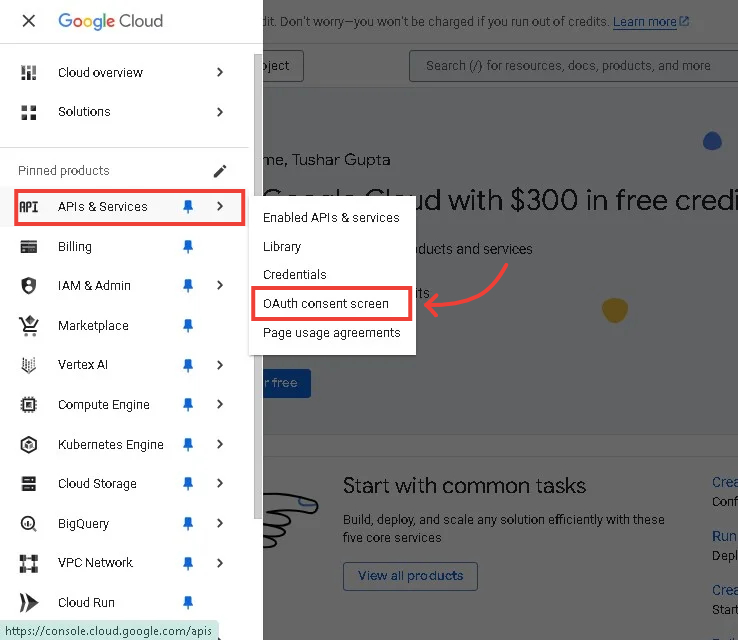
- Enable OAuth API:
- Navigate to APIs & Services > Library.
- Search for Google+ API and enable it.
- Create OAuth Credentials:
- Go to APIs & Services > Credentials.
- Click Create Credentials > OAuth 2.0 Client ID.
- Select Web Application as the application type.
- Configure Authorized Redirect URIs:
- Add the following URI for local testing:
http://localhost:3000/api/auth/callback/google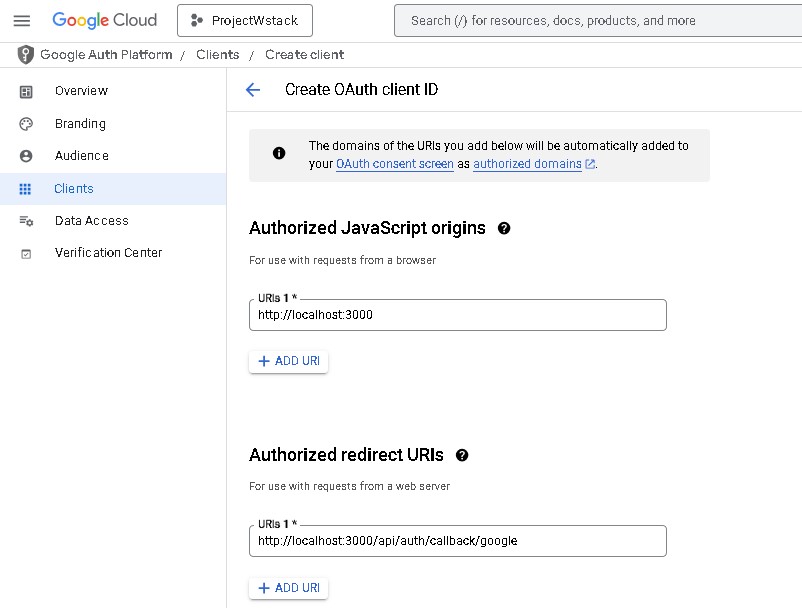
- Add the following URI for local testing:
- Copy Credentials:
- Copy the
Client IDandClient Secret. - Paste them into the
.envfile asGOOGLE_CLIENT_IDandGOOGLE_CLIENT_SECRET.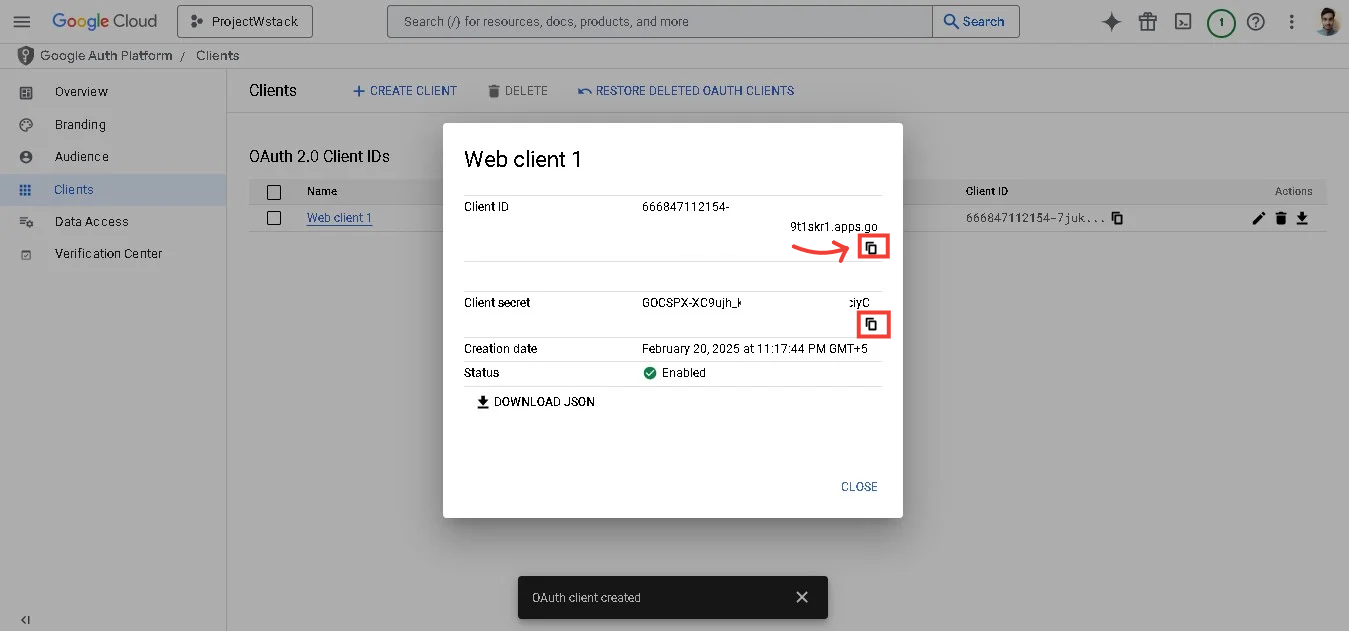
- Copy the
6. Set Up GitHub OAuth Credentials
- Go to GitHub Developer Settings:
- Visit GitHub Developer Settings.
- Create a New OAuth App:
- Click New OAuth App.
- Fill in the required fields:
- Application Name: Your app name.
- Homepage URL:
http://localhost:3000. - Authorization Callback URL:
http://localhost:3000/api/auth/callback/github.
- Copy Credentials:
- Copy the
Client IDandClient Secret. - Paste them into the
.envfile asGITHUB_CLIENT_IDandGITHUB_CLIENT_SECRET.
- Copy the
7. Set Up Redis
- Install Redis:
- Download and install Redis from https://redis.io/download.
- Run Redis Locally:
- Start the Redis server:
redis-server - Verify it’s running by connecting to it:
redis-cli ping - If it responds with
PONG, Redis is running correctly.
- Start the Redis server:
- Update
.env:- Use the default Redis URL:
REDIS_URL=redis://localhost:6379
- Use the default Redis URL:
8. Set Up AWS Credentials
- Go to AWS Management Console:
- Visit AWS Management Console.
- Create IAM User:
- Navigate to IAM > Users > Add User.
- Set permissions (e.g.,
AmazonS3FullAccess). - Generate access keys (
AWS_ACCESS_KEY_IDandAWS_SECRET_ACCESS_KEY).
- Update
.env:- Paste the access keys and your preferred region into the
.envfile:AWS_ACCESS_KEY_ID="your-access-key-id"
AWS_SECRET_ACCESS_KEY="your-secret-access-key"
AWS_REGION="your-region"
- Paste the access keys and your preferred region into the
Next Steps
- Save the
.envfile. - Restart your development server to apply the changes.
- Verify that all services (MongoDB, Redis, etc.) are running correctly.
- Test your application to ensure everything is working as expected.